Friday, December 21, 2012

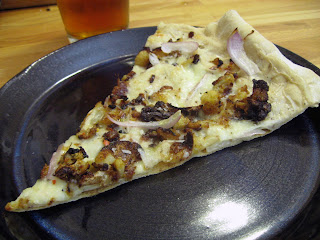
Gumbo Pizza

This is an admittedly complicated pizza recipe, but well worth the time and effort to make. A couple of times a year, we make a huge pot of gumbo, stirring and simmering for hours until all of the flavors have mingled and melded. Here, we've broken down our favorite Louisianan recipe into a pizza-ready version.

The first ingredient in any gumbo is the roux: browned flour and oil that serves as the foundation for the rich stock of okra, seafood and andouille sausage.

PREP:

Heat 1/4 cup canola oil and 1/4 cup all-purpose flour in a medium-sized saucepan over medium heat. Stir constantly for 15-20 minutes until it browns to a nice nutty color. Then stir in 1/4 cup chopped onion, another 1/4 cup chopped bell pepper and 1 clove of chopped garlic and continue cooking until the onion is soft.


While that's going on, measure 1/2 cup of water, 1/2 cup crushed tomatoes, 1/2 cup chopped okra (frozen is fine, but thaw it first), 1 tablespoon chopped scallions, 1 teaspoon dried thyme, 1 crumbled bay leaf, 1 teaspoon salt, 1/2 teaspoon black pepper, 1/4 teaspoon cayenne pepper, 1 teaspoon lemon juice, and a dash each of ground allspice, mace and cloves. Stir all of those ingredients into the pan with the onions and cook for another 10 minutes, stirring regularly.

Since we're not dedicating hours to cooking down the stock, we then used an immersion blender to make a nice smooth sauce.


TOPPINGS (layered in this order):
  1. Very Best Pizza Crust Ever, par-baked
  2. A generous spread of the onion-okra sauce
  3. Thinly sliced andouille sausage (Do yourself a favor and don't substitute any other kinds of smoked sausages; the andouille adds such a distinctive flavor.)
  4. More chopped okra
  5. Grated mozzarella cheese
  6. Raw shrimp, butterflied and/or sliced in half down the middle
  7. Cooked chicken, chopped

Bake at 450 degrees F for about 11 minutes until the shrimp are pink. Serve topped with a splash of Louisiana-style hot sauce, such as Crystal.


Sunday, December 9, 2012

Latke Pizza

Happy Hanukkah! Maybe you're already eating your fill of latkes, but it seems like prime time to experiment with how everyone's favorite potato pancakes might work in pizza-form.

PREP:
  • Chop a medium onion and saute in 2 tablespoons of oil over low heat until nicely browning.
  • Peel 2-3 baking potatoes and use a food processor or box grater to shred them into thin strips. Add to the pan with the onions and a healthy pinch of salt and saute until the potatoes are cooked and starting to crisp around the edges. Stir often to prevent sticking.


TOPPINGS (layered in this order):
  1. Simple Crust, par-baked
  2. A generous spread of unsweetened apple sauce
  3. The potato-onion mixture
  4. A small amount of grated mozzarella

Bake at 450 degrees F for about 10 minutes until the cheese is melted and the potatoes look a little browner. Sprinkle the top with chopped chives or scallion tops and dollop with sour cream and additional apple sauce.


Monday, December 3, 2012

Fig Pizza Update

Just repeated our Fig Pizza, but this time added a balsamic reduction. Perfection.

To make the reduction, pour 1/2 cup of balsamic vinegar into a small saucepan. Cook over medium heat, stirring constantly, for several minutes until the liquid has thickened and evaporated out. It's best to do this right before you're ready to use it, otherwise it gets very sticky as it cools.


Saturday, November 3, 2012

Kids' Pizzas

Pizza is the perfect way to get kids involved in cooking. Give them an apron and space to use the rolling pin, and let them have at a small ball of dough! We like to set out small bowls with a variety of kid-friendly toppings — such as tomato sauce, pepperoni, halved cherry tomatoes, sliced mushrooms, grated cheese — and give them free reign to pick their own toppings. With younger children, adult hands are helpful to make sure the toppings get somewhat evenly distributed, but older kids enjoy the chance to do their own thing. Leaving the adults to their own pizza indulgence...

Here, our friends' 3-year-old shows off some mad pizza-making skills.


Saturday, October 20, 2012

Guatemalan Black Bean Pizza

I spent a semester in college studying Spanish in Guatemala. Black beans and hand-pressed tortillas are THE two staple foods, eaten for three meals a day by many people across the country. My favorite preparation of black beans is called "licuados" — a thick paste perfect with eggs or sauteed veggies or ... really anything. We happened to have some leftover chicken around, which made for the perfect Guatemalan-themed pizza.

PREP:
Chop a small onion and saute until soft and translucent, but not browned. In a blender, process the sauteed onions, 2 cups cooked black beans and 1 garlic clove. Add water or some reserved bean liquid to make a smooth, thick, saucy consistency.


TOPPINGS (layered in this order):
  1. Corn Masa Crust, par-baked
  2. A generous spread of the liquified beans
  3. Queso fresco, grated or chopped into tiny chunks (queso fresco is a white farm cheese available at Hispanic markets and many mainstream grocery stores) 
  4. Grated mozzarella
  5. Cooked, chopped chicken breast
  6. Sprinkle of chopped cilantro

Bake at 450 degrees F for about 8 minutes, until the cheese is melted and the crust begins to brown. ¡Buen provecho!

Thursday, October 18, 2012

Corn Masa Crust

As avid Latin American food-eaters (we seek out the best Mexican taco trucks in whatever city we visit), we were pretty excited to run across a corn masa pizza crust recipe in our newly acquired "Artisan Pizza and Flatbread in Five Minutes a Day" cookbook.

Corn masa is the flour used to make tortillas, tamales, arepas, etc. — it's the staple ingredient for all sorts of our favorite foods. In this pizza dough, the masa adds a slight corn flavor and denser texture that is perfect for topping with beans, seasoned meats, and a sprinkle of queso fresco.

INGREDIENTS:
  • 1 cup lukewarm water (100 degrees F or less)
  • 1 teaspoon active dry yeast
  • 1 teaspoon sugar
  • 2 teaspoons neutral-flavored oil
  • 1/2 cup corn masa flour (also called masa harina)
  • 1 and 2/3 cups unbleached all-purpose flour
  • 1 teaspoon salt

DIRECTIONS:
  1. In a large bowl, dissolve the yeast and sugar in the warm water. Let stand until frothy, about 10 minutes.
  2. In a separate bowl, mix the masa flour, all-purpose flour and salt.
  3. Once the yeast is proofed (aka frothy), stir in the oil and mix in the dry ingredients without kneading the dough. This can be done in a food processor with a dough attachment, a heavy duty stand mixer with the paddle attachment, or using a wooden spoon. It may help to wet your hands and mix in the last bits of flour manually.
  4. Cover the dough with a kitchen towel and allow to rest at room temperature for about 2 hours, until the dough rises and collapses (aka flattens on the top).
  5. The dough can be used right away after that initial rise, but it may be easier to handle when cold. Refrigerate it in a lidded, but not airtight, container and use within 10 days or divide it into two balls and freeze for up to 2 weeks. Thaw in the refrigerator overnight before use.
  6. When you're ready to make pizza, preheat the oven to 450 degrees F. If using a pizza stone, place the stone in the oven for preheating. If using a baking sheet, lightly flour it (but don’t preheat). 
  7. On a well-floured surface, roll out one ball of dough until it is approximately the size of your pizza stone or baking sheet. 
  8. Par-bake the crust until barely brown and rigid, about 3 minutes.
  9. Remove the crust from the oven and let rest on wire racks to avoid sogginess. Top with your favorite toppings and return to the oven for an additional 5-10 minute (depending on toppings), until the cheese is melted and the edges are golden brown.
Recipe yields 2 crusts.

This crust is vegan and I suspect would be pretty easy to make gluten-free by subbing out the all-purpose flour with your favorite blend.

Tuesday, September 18, 2012

Fig Pizza

Kicking off a new season of pizza-making with a bang!

This is actually an old favorite by now, but with figs currently in season, it's prime time to try it again. In these pictures from April (*hanging head in procrastinator shame*), we used dried mission figs, but fresh ones are delightful as well.


TOPPINGS (layered in this order):
  1. Whole wheat crust, par-baked with chopped fresh rosemary pressed into the surface before baking
  2. Drizzle of extra-virgin olive oil
  3. Grated mozzarella
  4. Crumbled gorgonzola
  5. Thinly sliced shallots
  6. Sliced figs - lots of them
  7. Thinly sliced pears (Bosc are nice)


Slide that pizza back into the oven at 425 degrees F and bake for about 10 minutes, until the pears soften and the cheese browns slightly. Top with freshly grated Parmesan and another flourish of extra-virgin olive oil.


Saturday, March 31, 2012

Baked Potato Pizza

As if pizza weren't comfort food enough...

Baked Potato Pizza is the perfect rainy Saturday afternoon pizza, when you're ready for a lazy, heavy meal, a cold beer and quality time with your sofa cushions. You can bake the potatoes solely for the pizza, or use leftovers from another meal. Either way, don't plan to move anywhere for a few hours after dinner.


PREP:
  • Wash 2-3 large russet potatoes (skin on!), wrap in tin foil and bake in the oven at 350 degrees F for 1 hour. OR, shortcut version, puncture the potatoes a few times with a fork and microwave them (without tin foil!) on high for about 10 minutes or until soft inside. Either way, allow the potatoes to cool a bit, then chop them into small cubes and toss them with a mixture of Italian herbs (we like Mrs. Dash's salt-free version).
  • (Optional) Pre-cook 2 slices of bacon in a heavy skillet until they just start to get crispy.

TOPPINGS (layered in this order):
  1. Very Best Pizza Crust Ever, par-baked
  2. A few dollops of sour cream, spread very thinly over the crust
  3. The cooked potato cubes, tossed with Italian seasoning
  4. A handful or two of chopped chives
  5. (Optional) The bacon, chopped into small bits
  6. A healthy dose of grated mozzarella cheese (for gooeyness) mixed with a sharp cheddar cheese (for flavor)
Bake on a pizza stone at 450 degrees F for about 8 minutes, until the cheese is melted and the crust begins to brown. Sit back and put your feet up.


Friday, March 23, 2012

White Pizza with Roasted Cauliflower

For those of you who follow us regularly, it won't come as any surprise that we don't always make pizzas with red sauce. In fact, more often than not, we opt for some sort of alternative to a tomato-based spread. In spite of that adventuresome spirit, we haven't legitimately explored the White Pizza in all its glory.

Without scientific data to back up this claim, it seems like many white pizzas are topped with vegetables, while many red pizzas tend to involve meat. However, the density of high-fat dairy products on white pizzas (i.e. Alfredo sauce + too much cheese) probably makes them much less healthier than their crimson counterparts.

Enter Pizza Your Face.

We [pretend to] eat health-consciously and we eat a lot of pizza. So it stands to reason that we would look for a way to bring you a white pizza with a little bit nutritional value.

Enter the roasted cauliflower.

Before

After
Lookie here at all these great nutrients. And then start munching because you'll feel totally indulgent when you taste the cauliflower.

ROASTED CAULIFLOWER & GARLIC:
Preheat your oven to 425 degrees F with the pizza stone in the oven. Cut apart a whole head of cauliflower (maybe 2?) into large florets and give them a good rinse. Cut the florets into 1/4-inch slices. Mix a pinch of salt into about 4 tablespoons of olive oil and toss the cauliflower with the oil. Roast them on the pizza stone for about 30 minutes total, turning every 10 minutes, until they are very brown and caramelized. They will shrink a lot. Cool them on a paper towel to absorb any excess oil.

For the last 8-10 minutes, throw in 4 whole garlic cloves, also tossed in olive oil, and roast them until the outsides start to brown and the insides are soft.

Keep the cauliflower away from your significant other, because otherwise the entire batch will disappear in about 5 minutes... 

GARLICKY WHITE SAUCE:
Melt 1.5 tablespoons of butter* in a small saucepan over medium heat. Allow it to get bubbly and start to brown. Once the foaminess starts to die down, stir in 1.5 tablespoons of flour and heat for 1 minute. Slowly add 3/4 cup of milk (room temperature is better than cold), then a pinch of salt and a dash of cayenne powder, and whisk non-stop for 5-8 minutes until the mixture boils and thickens. Throw in the roasted garlic cloves and blend until smooth.

*Yes, use real butter. A minor amount of fat makes it all worthwhile.

TOPPINGS (layered in this order):
To avoid making the crust soggy, be sure you have all of your ingredients prepped and ready to go up front.
  1. Whole wheat crust, par-baked
  2. Spread of the white sauce
  3. Grated mozzarella and Parmesan - just enough to help the toppings stick, but don't go gooey on this one
  4. Lots of roasted cauliflower
  5. Thinly sliced shallots
Pop it all back in the oven at 425 degrees F for about 8 minutes. Top with freshly ground black pepper, crushed red pepper flakes, a drizzle of extra virgin olive oil and a little extra grated Parmesan.


I'm salivating again just thinking about it.

Thursday, March 22, 2012

Wooden Pizza Cutter

Check out this cool gadget some friends gave us:

It's a wooden pizza cutter! Makes it possible for pizza-cutting-challenged individuals like myself to slice across the entire pizza in one straight line. Wild.

Reuben Pizza

A belated St. Paddy's Day to ya. Don't bother putting on your green T-shirt or testing your Irish brogue, but you might want to dig out that leftover corned beef from the back of your fridge. And turn the boiled cabbage into sauerkraut...


It appears there are conflicting accounts about the history of the Reuben sandwich. It was either created by a Lithuanian man living in Nebraska or by a German man living in New York, both, naturally, with Reuben as part of their name.

Reuben pizza also appears to be a well-established recipe, so we make no claims of ownership, other than that we did throw it together off the top of our heads and we have some ideas for how we'd improve it next time. On the "throw it together" side, it ended up being an unusually processed meal for us:


To "improve it next time" we would come up with a decent quick sauerkraut recipe and make our own Russian dressing. We also thought our pizza could have used more of almost all of the toppings. So be generous, while also keeping in mind that over-loaded pizzas are hard to maneuver and prone to sogginess.

Nonetheless it was tasty. Here's how it went:

TOPPINGS (layered in this order):
  1. Very Best Pizza Crust Ever - Before the par-baking step, stretch out the dough as usual and sprinkle a healthy dose of caraway seeds over the surface. We gently pressed them in with a rolling pin to keep them from running away. Then continue with the par-baking.
  2. Generous spread of Russian dressing
  3. Grated Swiss cheese of a nice sharp variety
  4. A handful of grated mozzarella for meltedness
  5. Dollops of sauerkraut
  6. Slices of corned beef
Bake at 450 degrees F for 7-8 minutes, until the cheese is melted and the crust edges start to brown.

Tuesday, January 24, 2012

Mini Pizzas

Oooh, take a look at this!

Look here:

And here:

Those are mini Lively Pizzas, made by yours truly for ML's birthday party the other week. Super fun! And fairly painless!

Just divide your dough into about 30 balls instead of 3. ML made the dough the day before the party, divided it into mini balls and stored them in the refrigerator, layered in a pizza box with parchment paper in between. Party-day morning, he rolled them out and par-baked them. Then just before the party I threw some toppings on, popped them in the oven 8 or 9 at a time (using a cookie sheet instead of the pizza stone for convenience) and ended up with super fun party food. Took a little bit longer than making ordinary-sized pizzas, but they were easier to munch on while playing pin-the-flag-on-the-treasure-map. (Pirate-dinosaur theme, you know...)


Monday, January 23, 2012

Brussels Sprout Pizza

Reasons why 2 and 1/2 months have passed since our last pizza post:
  1. We got married in November
  2. I started a new job in November
  3. There was the usual sequence of holidays and holiday-related chaos
  4. We had a lot of leftovers to wade through after said holidays
  5. ML had a very significant birthday (starts with 4, ends with 0), accompanied by a significant party in January
  6. We're sort of intimidated by our own Bacon Jam Pizza recipe
I know, I know ... what kinds of silly reasons are those? What sorts of pizza enthusiasts let such mundane excuses get in the way of pizza-making?!

Sigh.

We're ashamed.

Fortunately, we re-commenced our pizza-making endeavors with great success. We may even have overcome our fears from #6. Because in addition to these...

...you also get all of these:


(Shout out to Alton Brown for the flavor combo idea.)

In defense of our pizza-making neglect, we made this one twice. The beta version needed some tweaking to get the right balance of flavors, so here's the final product. Be generous with the Brussels and apples and a little stingy with the blue cheese. Trust me, it evens out in the end.

PREP:
  1. If making your own dough or using store-bought raw dough, roll it out and par-bake it for about 3 minutes. (Curious why? Read our explanation here.)
  2. Cook the bacon in a heavy skillet until it's almost-crispy-but-not-quite. Drain it on paper towels.
TOPPINGS (layered in this order):
  1. Very Best Pizza Crust Ever, par-baked
  2. Thin spread of Dijon mustard - enough that the surface is slathered but not goopy
  3. Tiny crumbles of blue cheese (something generic is fine) - just a small amount, it doesn't take much to get the flavor across
  4. Grated mozzarella
  5. Thinly sliced onions
  6. Sliced Granny Smith or other tart apple
  7. A generous amount of thinly sliced Brussels sprouts - they shrink a lot in the oven, so put on more than what looks reasonable
  8. Chopped bits of bacon (optional; veggers, if you omit the bacon, add an extra sprinkle of salt)
  9. Sprinkling of crushed red pepper flakes
Bake that guy at 450 degrees F for about 10 minutes, or until the edges of the Brussels sprout leaves start to blacken. Drizzle it with extra virgin olive oil and overcome any residual childhood vegetable trauma.

Before:

After:

While eating:


(Skeptical about the sprouts? Let the Produce Geek himself tell you how great they are.)